
Sharing is Caring
- You are here:
- Home »
- Blog »
- Blog
- » How to Make a Wooden Bike Ramp

How to Make a Wooden Bike Ramp
Are you up into improving your biking skills? Build a small ramp to spark up your competitive spirit. We usually find bike ramps in open parks and recreational areas around the village, but did you know that we can also make bike ramps in our places? Just make sure that the size is enough to keep you safe!
Bike ramps are designed to train bikers who plan to build a career in competitive cycling. There are types of bike ramps which can easily be bought in online stores like Amazon and Ebay, and then you will just assemble it yourself. However, if you do not have enough bucks to buy it, you can make bike ramps out of your wood stashes. Here is a four step instruction on how to make wooden bike ramps on your own.
Things You Need to Prepare:
- Plywood Sheets
- 4 X 4 Wood
- Circular Saw
- Jig Saw
- Drill bits and Screw Drivers
- Kreg Jig Pocket Holes
Via blogher.com
How to Make Wooden Bike Ramps: 4 easy steps!
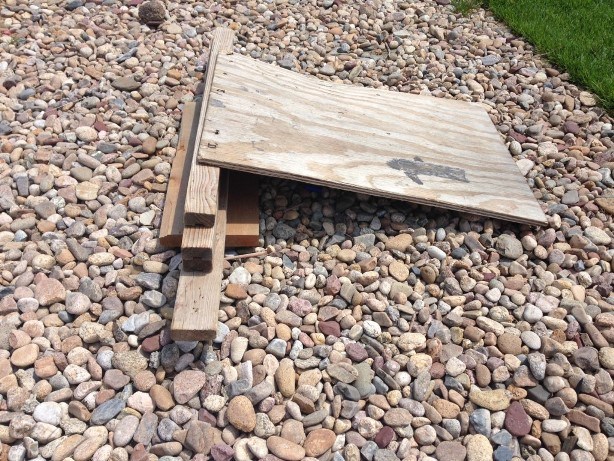
Step 1: Prepare the Ramps
Using the jig saw and the circular saw, cut the plywood sheets depending on the size of the bike ramp that you want to establish. Make four copies of each, and make sure that all of them are in the same sizes.
Then, make around four grooves in each of the plywood ramps. Make sure that the scale of the groves fit with the size of your beams. Usually, bikers tend to get a 4 X 4 wood for the beams.
Step 2: Get your Beams Done
Purchase 4 X 4 wood from the nearby hardware store. Cut them depending on the length of the ramp that you will be making.
Via www.wikihow.com
Mount the beams on the groves of the plywood sheet to complete the structure of the ramp. To ensure that it is properly glued, it is best to make use of a Kreg Pocket Hole Jig tool to join the parts together.
To know the best pocket hole jig in town, check these five best power tools that you can obtain from the nearest hardware store.
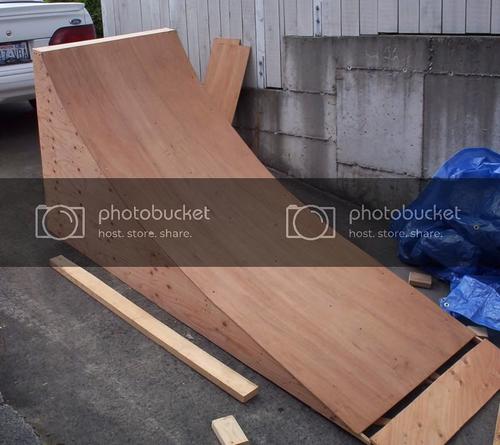
Step 3: Build the Ramp Deck and Ramp Base

Via instructables.com
Now that you have completed the structure of the bike ramp, it is time to finish it by putting an appropriately cut plywood which will serve as the ramp deck and ramp base. Put a longer plywood on the base where you can put ramp weights.
Step 4: Run a Trial
Get your bike and put your helmet and safety gears on to try the ramp. Check if it can carry your weight and that it will not break when a bike is driven. If it is a success, you can now customize your ramp by putting pain or names on it.
Via bikemag.com
Pro-Tips in Making a Wooden Bike Ramp:
- While working on a wooden bike ramp, make sure that you wear gloves to avoid any possible splints.
- Choose a high-quality Kreg jig pocket hole tool to make sure that you are bolting the wood properly to prevent injuries
- Always wear a comfortable yet safe gears while woodworking to cover your body from potential falling of materials
Now you can proceed with achieving your dream as a competitive biker by making your bike ramp at home! Out of your father's or grandfather's wood stashes, make a wooden bike ramp to improve your biking skills.
Do you have any other suggestions on how to make a wooden bike ramp? Share your insights and ideas by posting a comment below!
Bio: Victor is a founder of victorcrafter.com . He believes that money can be saved more if people will consider understanding different DIY procedures. To lessen wood stashes, he focuses in building furniture and other wooden things which can also help people earn a living.
About the Author Nick Soros
Hi, I'm Nick Soros. I have been an cycling enthusiast from 2006. Ezroadbike.com is my personal blog where I share my pedaling experience. No matter you are a new cyclist or skillful one, you would find useful topics in my site. Have a great cycling...